A cooler bag is a convenient way to carry cold drinks, fresh food, snacks, and prepared meals without using a refrigerator. Whether you are packing lunch for work, preparing for a beach trip, transporting groceries, or organizing refreshments for an outdoor event, adding ice can help maintain a low temperature inside the bag.
However, there is an important distinction between putting ice inside a cooler bag and pouring loose ice directly into its main compartment. Some insulated bags can handle loose ice and the water produced as it melts, while others are designed primarily for reusable ice packs or frozen water bottles. Using the wrong type of cooling method may result in leaking water, wet packaging, damaged materials, or food that is not kept at a safe temperature.
The answer depends on the cooler bag's inner lining, seam construction, closure, insulation, and intended use. The type of ice you choose and the way you pack it also affect the result.
This guide explains when you can put ice directly in a cooler bag, how to choose the right cooling method, what to do with melted ice water, and which construction features matter when selecting a cooler bag for regular ice use.
Can You Put Ice Directly in a Cooler Bag?
Yes. Loose ice can be placed directly inside a cooler bag when the finished product is designed to accommodate ice and the resulting meltwater. However, not every insulated bag is suitable for this purpose.
The distinction matters because cooler bags serve different markets. Some are lightweight lunch bags designed for reusable gel packs. Others are larger beverage coolers intended for outdoor events, beach trips, picnics, or camping. Although both products may contain an insulated layer, their requirements for moisture resistance, load capacity, and cleaning can differ considerably.
When Is Direct Ice Use Appropriate?
Loose ice is particularly useful when the primary contents are sealed cans, bottles, or other items that can tolerate contact with cold water.
It is commonly considered for:
- Beverage coolers for outdoor gatherings
- Picnic and beach coolers
- Camping and fishing bags
- Event beverage carriers
- Grocery transport products designed for wet conditions
- Specialty cooler bags developed for direct ice use
In these applications, loose ice can fill the gaps around containers and provide close contact for cooling.
However, direct ice use is less convenient when the bag contains paper packaging, prepared meals, electronics, or other moisture-sensitive products. A bag designed primarily for lunch boxes may be better suited to reusable gel packs or frozen water bottles.
Is It Different From Putting Ice in a Hard Cooler?
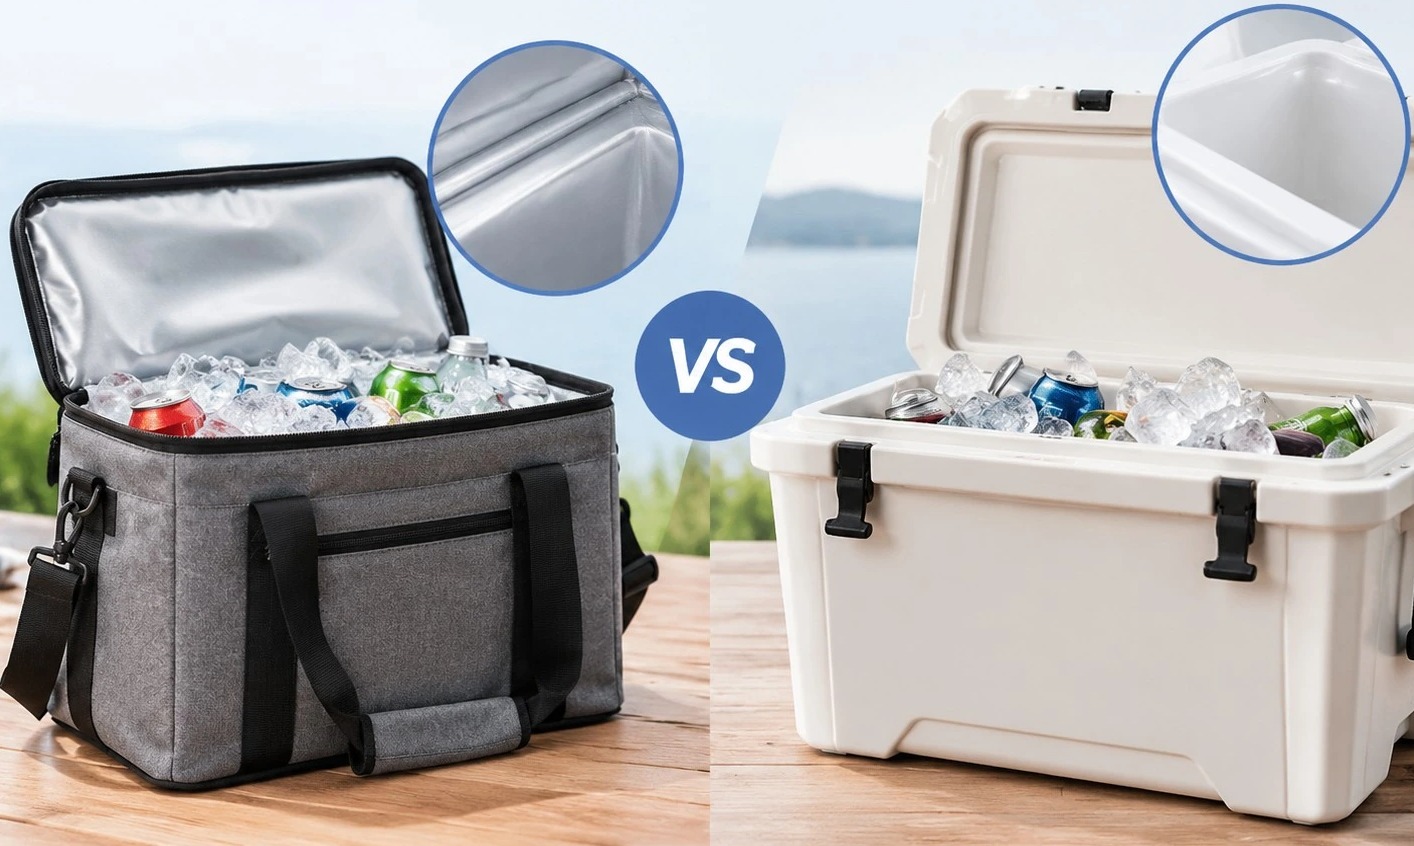
The basic cooling principle is similar, but the construction can be quite different.
Many hard coolers use molded plastic interiors and rigid walls designed to contain ice and water. Soft cooler bags have flexible panels, sewn corners, and closures that may allow water to escape when the bag is tilted or squeezed.
Some premium soft coolers are specifically engineered for loose ice. Others prioritize low weight, foldability, or convenient lunch storage instead of water containment.
What Happens When You Put Loose Ice in a Cooler Bag?
Understanding what happens after ice enters the bag helps explain why some products perform well with loose ice and others do not.
0 to 30 Minutes: Immediate Surface Cooling and Early Phase Change
Ice begins absorbing ambient heat; a thin layer of liquid water forms at the base.
Direct surface contact cools the internal payload rapidly.
1 to 3 Hours: Hydrostatic Pressure and Seam Stress
Meltwater accumulates in the bottom corners, creating hydrostatic pressure.
- In stitched bags: Water penetrates needle holes into the intermediate foam core.
- In welded bags: The seamless tub liner holds liquid water securely with zero leakage.
4 to 12 Hours: Thermal Equilibrium and Phase Depletion
Liquid water conducts heat significantly faster than static trapped air.
- In stitched bags: Soaked outer fabrics create external puddles and thermal insulation fails.
- In welded bags: A cold water slurry remains below 4°C, preserving chilled contents safely.
Post-Trip: Drying and Hygiene Maintenance
- In stitched bags: Trapped moisture inside the foam cannot dry easily, breeding black mold and bad odors.
- In welded bags: The interior wipes clean and dry instantly, with zero moisture entering the insulation walls
The 3 Key Factors Determining Direct Ice Compatibility
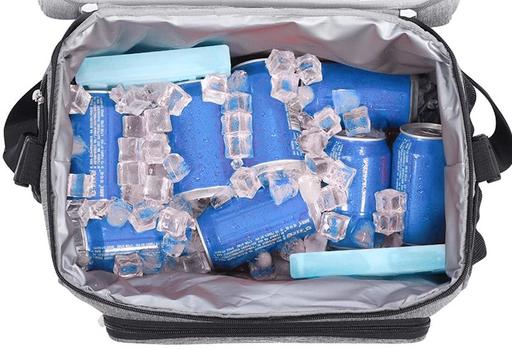
Whether a cooler bag can safely hold loose ice without leaking comes down to three technical design factors:
1. Seam Construction: High-Frequency (RF) Welding vs. Cut-and-Sew Stitching
The primary differentiator between a leaking cooler bag and a 100% leakproof cooler bag is how its seams are joined:
- Traditional Stitched Seams (Non-Leakproof): Standard sewing machines use needles that pierce through the outer fabric, foam core, and inner liner. A standard 20L cooler tote features 750 to 1,200 needle puncture holes along its bottom perimeter. As ice melts, hydrostatic pressure forces water through these needle holes into the foam layer and out onto car seats or floors.
- High-Frequency (RF) Dielectric Welded Seams (100% Leakproof): High-frequency welding passes electromagnetic radio waves (27.12 MHz) through overlapping thermoplastic layers (PEVA or TPU). The polymer molecules vibrate and fuse into a continuous, molecularly bonded joint with zero needle holes. Premium bags use 3D molded "bathtub" tooling to create a seamless one-piece bottom bucket that holds standing water indefinitely.
2. Inner Liner Materials: Food-Grade PEVA vs. TPU vs. Aluminum Foil vs. PVC
The inner lining polymer dictates puncture resistance against sharp ice cubes, food-contact safety, and low-temperature flexibility:
-
Food-Grade PEVA (Polyethylene Vinyl Acetate): An eco-friendly, non-chlorinated vinyl copolymer (0.18mm–0.30mm thick). It is 100% BPA-free, lead-free, and phthalate-free, fully compliant with FDA 21 CFR 177.1350 and EU REACH. It welds easily, stays flexible down to −25∘C, and represents the ideal balance of cost and performance for retail cooler bags.
-
Heavy-Duty TPU (Thermoplastic Polyurethane): Used in commercial, marine, and expedition-grade soft coolers (0.40mm–0.84mm thick). Polyether-based TPU offers tensile strength exceeding 45 MPa, extreme puncture resistance against sharp ice edges, and complete resistance to mold, mildew, and sub-zero cracking down to −40∘C.
- Aluminum Foil / Metalized PET Film: Paper-thin aluminum film laminated onto EPE foam. While reflective against radiant heat, it is fragile, punctures easily against ice cube corners, and is assembled with stitched seams—making it completely unsuitable for direct loose ice.
- Traditional PVC (Polyvinyl Chloride): Requires harmful ortho-phthalate plasticizers (DEHP, DBP) to remain flexible, which can migrate into food and ice meltwater. High-quality retail brands have phased out PVC in favor of food-grade PEVA and TPU.
3. Insulation Foam Core: Closed-Cell NBR/EVA vs. Open-Cell / Thin EPE
The type and thickness of foam determine whether the bag keeps ice for 6 hours or 48 hours:
- Closed-Cell NBR (Nitrile Butadiene Rubber) / EVA Foam: Contains millions of sealed, independent microscopic air chambers. It provides ultra-low thermal conductivity and absorbs less than 0.5% water by volume. Even if exposed to moisture, it will not absorb water like a sponge.
- Standard EPE (Expanded Polyethylene) Foam: Lightweight and economical for 4–12 hour use. High-density versions (8mm–12mm) offer solid performance when paired with a welded PEVA liner.
- Open-Cell Polyurethane Foam: Avoided in quality cooler bags because its interconnected cell structure acts as a sponge, absorbing water and destroying thermal insulation.
Why Stitched Bags Leak with Loose Ice
Meltwater Pressure: Liquid water naturally drains to the lowest point of the bag, creating hydrostatic head pressure against the bottom corner seams.
Capillary Penetration: Liquid water enters the needle puncture holes along the stitch line through capillary action.
Foam Saturation: The intermediate foam core absorbs the meltwater. Because water conducts heat roughly 24 times faster than static trapped air, the bag loses over 80% of its thermal insulation capacity.
External Leaking & Staining: Water seeps through the outer polyester fabric, soaking vehicle trunks, picnic tables, and personal belongings.
Mold Proliferation: Moisture trapped inside the sealed foam layer cannot evaporate. Over 48 to 72 hours, black mold (Aspergillus niger) and anaerobic bacteria develop, producing a sour mildew smell and ruining the bag permanently.
What Makes a Cooler Bag More Suitable for Loose Ice?
For frequent loose-ice use, evaluate the complete interior construction.
| Feature |
What to check |
Why it matters |
| Inner liner |
Water resistance, durability, and cleanability |
Helps contain moisture and simplifies maintenance |
| Seams and corners |
Sealed, welded, or otherwise suitable construction |
Reduces potential leakage paths |
| Opening and closure |
Intended use, closure fit, and water-management design |
Limits heat exchange and potential escape points |
| Bottom panel |
Structural support and resistance to abrasion |
Supports the weight of ice, drinks, and water |
| Insulation |
Material, thickness, and continuity |
Slows heat transfer into the compartment |
| Handles and straps |
Load capacity and reinforcement |
Helps the bag carry a heavy, wet load |
| Interior surface |
Smoothness and access to corners |
Makes cleaning and drying easier |
No single feature guarantees performance. The materials, construction, dimensions, and intended use must work together.
Loose Ice vs. Ice Packs vs. Frozen Water Bottles
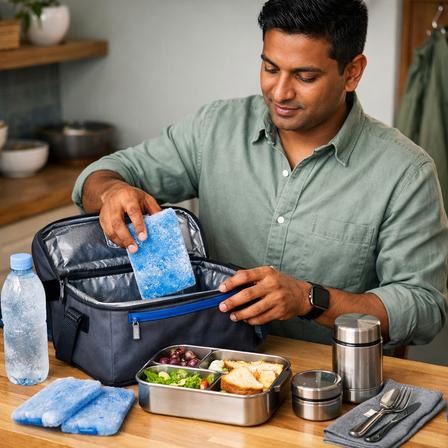
Loose ice is only one way to cool a cooler bag. Ice packs and frozen water bottles can be better choices when convenience, cleanliness, or keeping food dry matters more than direct contact with ice.
The best option depends on the contents, trip duration, access to a freezer, and whether the bag is designed to contain meltwater.
Loose Ice Cubes
Loose ice cubes are widely available and easy to use. They fit around cans and bottles, fill small gaps, and provide direct contact between the ice and the containers being cooled.
This makes them useful for short outdoor gatherings, parties, picnics, and beverage transport. They are especially convenient when the bag is designed for loose ice and the contents are sealed.
Their main disadvantage is meltwater. Small cubes have a relatively large surface area compared with their volume, so they can melt more quickly than larger blocks under comparable conditions. The resulting water may also wet food packaging or escape through unsuitable seams.
Choose loose cubes when quick cooling and flexible packing are priorities, and when the bag can safely manage the water.
Crushed Ice
Crushed ice creates many small pieces and can fill spaces around irregularly shaped containers. It is useful when close contact is needed, such as when chilling cans or bottles for an event.
However, its small pieces create a large total surface area, which can accelerate melting. Crushed ice can also create a substantial amount of water in a relatively short period, especially in hot environments.
It is therefore most suitable for applications where rapid chilling is important and the bag can contain and manage the resulting water. It is not usually the most convenient option for a soft lunch bag containing meals or paper packaging.
Block Ice
Block ice generally melts more slowly than small cubes of comparable total mass under similar conditions because it exposes less surface area to its surroundings.
It can be useful for longer outings, camping, fishing, and other applications where maintaining a cold source over time is important. However, a large block may take up more usable space and may not fit the shape of a compact cooler bag.
Block ice also requires careful handling. Heavy pieces can place extra stress on the base, and hard or sharp edges may damage a thin liner if dropped or pushed against it.
Use block ice when longer-lasting cooling is more important than flexible packing, provided the bag is built for the load.
Reusable Gel Ice Packs
Gel packs are sealed containers filled with a freezable cooling medium. They are reusable, relatively clean, and convenient for repeated use.
Unlike loose ice, a properly sealed gel pack does not release meltwater into the cooler bag during normal use. This makes it a practical choice for lunch bags, prepared meals, groceries, and items that need to remain dry.
Gel packs are especially useful when the bag has a standard stitched lining that is not intended to contain water. They can also be arranged around containers without requiring the entire compartment to accommodate loose ice.
Their limitations are that they must be frozen before use, have a fixed shape, and may not provide the same close contact as loose ice around a large collection of irregularly shaped cans.
Frozen Water Bottles
Frozen water bottles offer a simple alternative. They provide a cold source while keeping the water contained inside the bottle as it thaws.
This makes them useful for road trips, hiking, lunch transport, and outdoor activities. Once the water has thawed, it can be consumed if the bottle and its contents have been handled appropriately.
Bottles also occupy space that might otherwise contain warm air, although their shape may make them less efficient than slim ice packs in a compact bag.
Choose bottles when you want cooling with minimal cleanup and appreciate having drinking water available later.
Quick Comparison:
| Cooling method |
Main advantage |
Main limitation |
Suitable applications |
| Loose ice cubes |
Easy to obtain and arrange around drinks |
Creates meltwater |
Beverage coolers and short outdoor events |
| Crushed ice |
Close contact with irregularly shaped containers |
Often melts quickly |
Rapidly chilling sealed drinks |
| Block ice |
Generally slower melting |
Bulky and heavy |
Longer outdoor trips |
| Gel packs |
Reusable and keeps the compartment relatively dry |
Requires advance freezing |
Lunches, groceries, and prepared meals |
| Frozen water bottles |
Sealed cooling source with later drinking-water use |
Takes up fixed space |
Road trips, picnics, and hiking |
For most everyday cooler bags, gel packs and frozen bottles are the easiest options. Loose ice is appropriate when the bag and its contents are specifically suited to it.
How to Put Ice in a Cooler Bag Properly
Once you have confirmed that the bag can handle your chosen cooling method, the way you arrange the contents becomes important. Good packing helps distribute the cold, protects delicate items, and makes the bag easier to use.
Step 1: Pre-Chill the Bag and Its Contents
Start with cold food and drinks. Refrigerate perishable ingredients and beverages before packing whenever possible.
A cooler bag slows heat transfer; it does not rapidly refrigerate warm food. If you load room-temperature drinks, the ice must absorb heat from those drinks before it can maintain their cold condition.
If practical, pre-chill the bag in a cool place or use a suitable ice pack before loading it. Avoid placing a hot or sun-heated bag directly into service without preparation.
Do not assume that freezing the entire bag is appropriate. Follow the manufacturer's care instructions, especially if the bag contains adhesives, reflective films, or materials that may be affected by extreme temperatures.
Step 2: Prepare the Contents Before Adding Ice
Close food containers, seal raw ingredients, and separate items that should remain dry. Organize the load so that frequently accessed drinks are easy to reach without removing all the food.
This is a practical improvement because every time you unpack and repack the bag, warm air enters and the arrangement becomes less effective.
For a bag containing both food and beverages, place fragile or moisture-sensitive items in suitable containers rather than relying on the liner to protect them.
Step 3: Place a Stable Cold Source at the Bottom
For a typical cooler bag, a flat ice pack, frozen bottle, or suitable block of ice can be placed at the bottom to provide a stable cold base.
The bottom is also exposed to heat from surfaces such as car trunks, sand, pavement, and outdoor tables. A cold source at the base helps buffer that heat.
If using loose ice, make sure the bag is designed to contain the resulting water. Avoid dropping heavy blocks into the compartment or forcing ice into corners where it could damage the lining.
Step 4: Add Chilled Food and Drinks
Place sealed drinks and food containers above or around the cold source. Arrange items so that cold packs can contact the containers where practical, without crushing delicate products.
For loose ice, you can fill gaps around sealed cans and bottles if the bag is designed for that purpose. Do not pour ice over unprotected sandwiches, paper cartons, or other items that must remain dry.
Keep raw meat and seafood securely contained and separate from ready-to-eat foods. Their juices should not be allowed to spread through the cooler compartment.
Step 5: Add a Cold Source Near the Top When Needed
A cold source at the top can help reduce warming near the opening, especially when the bag is relatively full. A flat gel pack or frozen bottle is often easier to position than a large block.
The goal is not to follow one rigid layering formula for every bag. The shape of the compartment, the size of the contents, and the type of cooling source all affect the most practical arrangement.
For example, a narrow lunch bag may work best with a slim gel pack beside the food container. A wide beverage cooler may accommodate ice at the bottom and around the sides.
Step 6: Close the Bag and Keep It in a Suitable Location
Close the bag fully after packing and place it in the shade whenever possible. Avoid leaving it on hot pavement, in direct sunlight, or in a heated vehicle for extended periods.
If you need to access drinks frequently, consider using a separate beverage bag. This prevents the food compartment from being opened every time someone wants a drink.
Step 7: Monitor Conditions During Longer Trips
For trips involving perishable food, use a suitable thermometer rather than relying on how cold the outside of the bag feels.
Check the internal temperature when necessary and replenish the cooling source before it is exhausted. A cooler bag's performance varies with weather, load, construction, and use, so a fixed number of ice cubes cannot guarantee a particular storage duration.
Where Should You Put Ice in a Cooler Bag?
There is no single placement that works best for every situation. The right arrangement depends on the bag's shape, the contents, and whether you are using loose ice or sealed packs.
Ice at the Bottom
The bottom is a practical location for heavy ice packs, frozen bottles, and block ice. It provides a stable base and helps counter heat entering through the lower panel.
This arrangement is particularly useful for grocery transport, camping, and bags carrying heavier items.
However, bottom-only cooling may leave some areas farther from the cold source. If the bag is large or densely packed, consider adding cold sources at the sides or top.
Ice Around the Sides
Placing ice packs beside containers can improve contact with the contents. This is useful when drinks or food containers are arranged in rows and the bag has a suitable shape.
Slim packs are often easier to fit along the walls without sacrificing too much interior capacity.
If using loose ice, side placement is only practical when the bag can safely contain the water and the contents are protected from moisture.
Ice at the Top
A cold source near the top can help cool the upper portion of the load and reduce warming around the opening. Flat ice packs work well because they can sit above containers without creating a large, unstable pile.
For loose ice, make sure the food is protected and the bag is intended for meltwater exposure. Avoid placing heavy ice directly on delicate food containers.
Should You Put Ice Only at the Bottom?
Not necessarily. A bottom layer is a useful starting point, but it does not guarantee even cooling throughout a large compartment.
For a small lunch bag, one or two well-positioned gel packs may be sufficient. For a large beverage bag, several cold sources arranged around the load may be more practical.
Rather than adding ice indiscriminately, arrange the cold source to suit the size and shape of the contents.
How Much Ice Should You Put in a Cooler Bag?
The required amount depends on the purpose of the trip, the size of the bag, the temperature of the contents, and the surrounding conditions.
There is no universal ice-to-food ratio that guarantees a particular temperature or duration for every cooler bag.
For Lunch and Short Grocery Trips
For a short trip with pre-chilled food, one or two suitable gel packs or frozen bottles may be enough. The priority is to maintain the cold condition of the contents while avoiding unnecessary moisture.
The exact number and size of packs should be based on the bag's internal dimensions and the temperature requirements of the food.
For Drinks and Outdoor Gatherings
A beverage cooler may need a larger quantity of ice because it often holds multiple cans or bottles and may be opened repeatedly.
If the bag is designed for loose ice, distribute the ice around the containers rather than leaving most of it in one isolated corner. Allow enough room for the contents and the closure to function properly.
For events lasting several hours, plan for replenishment instead of assuming that the initial ice supply will last indefinitely.
For Longer Outdoor Trips
Longer trips generally require more cooling capacity and better planning. Larger ice blocks or additional frozen packs may provide a longer-lasting cold source than small cubes, depending on the conditions.
Pack food cold from the beginning, limit unnecessary openings, and monitor temperature when food safety is important.
If the trip involves high ambient temperatures or extended storage, a soft cooler bag may not be sufficient for the entire period. Consider a more suitable cooling system if the application requires stricter temperature control.
How to Keep Food Dry When Using Ice
Loose ice is convenient for drinks, but many foods need protection from water. Even when the cooler bag is leakproof, moisture inside the compartment may affect food quality.
Use Sealed Containers for Moisture-Sensitive Foods
Sandwiches, salads, pastries, cut fruit, and prepared meals should be stored in containers or packaging that protects them from water.
A sealed container also makes the contents easier to organize and reduces the risk of food residue entering the meltwater.
For items that are intended to remain dry, do not depend on the outer shell of the cooler bag as the only barrier.
Keep Paper Packaging Away From Loose Ice
Cardboard cartons, paper bags, printed sleeves, and paper labels can soften or become damaged when wet.
If these items must be transported in a cooler bag, place them in a separate dry compartment or a waterproof container. Alternatively, use gel packs or frozen bottles instead of loose ice.
This is particularly relevant to grocery transport and retail applications, where packaging condition may matter as much as the temperature of the product.
Separate Raw Meat and Seafood
Raw meat, poultry, and seafood should be placed in sealed, leak-resistant containers or bags. Keep them separate from cooked food and ready-to-eat items.
If juices escape into the cooler, they may contaminate other contents and any meltwater in contact with them. A cooler bag should be cleaned thoroughly after such an incident.
For extended outdoor use, a separate bag for raw ingredients is often the simplest way to reduce cross-contamination risks.
Do Not Use Towels as the Main Leak Barrier
A towel may absorb condensation or small amounts of moisture, but it is not a reliable substitute for a leakproof liner or sealed container.
A saturated towel can hold water against the lining, increase drying time, and make the bag heavier. If water containment is important, choose a suitable bag or keep the ice inside a sealed container.
Condensation (Sweating) vs. Leaking & Food Safety Rules
1. How to Distinguish Condensation ("Sweating") from a Seam Leak
Consumers frequently mistake external surface condensation for a leaking inner liner:
-
External Sweating: On hot, humid summer days (30∘C+, high humidity), moisture in the warm ambient air condenses into fine water droplets when it strikes the cold exterior fabric of the bag. The water is clean, odorless, and appears evenly across outer panels.
- Seam Leak: Water actively drips from bottom corner stitches, vehicle mats become heavily soaked, and the water smells of cooler contents.
2. Food Safety Rules
Ice can help maintain a safe temperature for perishable food, but using ice does not automatically make food safe.
According to the U.S. Food and Drug Administration, cold food should be kept at 40°F (4°C) or below during outdoor transport and serving.
Start With Properly Chilled Food
Place perishable foods in the cooler directly from the refrigerator or freezer whenever possible. Do not use ice as a substitute for properly chilling food before transport.
If warm food is placed into a small cooler bag, the ice must absorb additional heat. The food may remain in an unsafe temperature range longer than expected, even if the outside of the bag feels cold.
For longer journeys, use a thermometer to check conditions rather than estimating by touch.
Keep Raw and Ready-to-Eat Foods Separate
Raw meat, poultry, and seafood should be securely wrapped and separated from cooked foods and items that will be eaten without further cooking.
If raw juices enter the meltwater, the water may spread contamination to other containers or packaging. Keep raw ingredients contained and clean the cooler thoroughly after use.
Follow Time Limits for Food Left Out
The FDA advises that perishable food should not remain at room temperature for more than two hours, or more than one hour when the outdoor temperature exceeds 90°F (32°C). These limits apply to food left outside appropriate temperature control; they should not be treated as a prediction of how long a cooler bag will stay cold.
If food has been exposed to unsafe temperatures for too long, do not rely on its appearance or smell to determine whether it is safe.
For more detailed guidance, refer to the FDA's official resource, Handling Food Safely While Eating Outdoors.
Is Dry Ice Suitable for a Cooler Bag?
Dry ice is different from ordinary water ice. It is solid carbon dioxide and is much colder than water ice. It can make certain materials brittle, and it releases carbon dioxide gas as it sublimates.
Do not use dry ice in a standard cooler bag unless the manufacturer explicitly confirms that the product is suitable for it and provides appropriate handling instructions. A tightly closed bag must not be assumed safe for dry ice because gas pressure and ventilation requirements differ from those for regular ice.
For most everyday applications, ordinary ice, gel packs, or frozen water bottles are more appropriate.
Cleaning, Sanitization, Drying & Long-Term Maintenance
Proper maintenance after using direct loose ice prevents mold, delamination, and unpleasant odors.
Step-by-Step Cleaning and Maintenance Guide:
- Drain: Fully unzip the bag, invert over a drain, and empty all meltwater.
- Wash: Wash the interior liner with mild dish soap and warm water (Max 40°C).
- Deodorize: Wipe with a 1:1 solution of water and distilled white vinegar or baking soda.
- Sanitize: Wipe with food-grade sanitizing wipes; avoid harsh bleach or abrasive solvents.
- Air Dry: Prop the bag wide open upside down in a well-ventilated, shaded area for 24 hours.
- Store: Store loosely zipped with an open silica gel desiccant pack in a dry room.
What Should Buyers Look for in a Cooler Bag Designed for Ice?
For consumers, choosing the right bag helps avoid leaks and inconvenient cleanup. For retailers, promotional product companies, and private-label brands, the decision also involves product specifications, intended use, quality consistency, and customer expectations.
A cooler bag designed for ice should be evaluated as a complete product rather than selected solely on the basis of its outer fabric or advertised insulation thickness.
Choose the Inner Lining for the Intended Use
The inner lining should match the expected moisture exposure and cleaning requirements.
A cooler bag intended mainly for gel packs and lunch containers may prioritize low weight, flexibility, and easy cleaning. A bag intended for loose ice needs a lining and complete construction suitable for contact with meltwater.
For buyers sourcing customized cooler bags, specify whether the intended application involves sealed ice packs, frozen bottles, loose cubes, or standing meltwater. These are different use conditions and should not be treated as interchangeable.
Evaluate Seam Construction and Leakage Performance
Seams are important because they connect the lining panels and create potential paths for water to escape.
Depending on the design, suitable solutions may include sealed, welded, or otherwise reinforced construction. The correct approach depends on the materials and product requirements.
Ask suppliers how the lining is joined, which areas are most vulnerable to leakage, and whether the finished bag has been tested under conditions that represent its intended use.
A claim such as "waterproof lining" should not replace a clear description of the complete bag's capabilities.
Match Insulation to the Expected Use
Insulation thickness and material affect temperature retention, but more insulation is not always the best choice for every application.
A compact lunch bag may require a lightweight structure that is easy to carry. An outdoor beverage bag may need more insulation and a larger volume. A bag intended for frequent use in hot conditions may require a different balance of insulation, closure design, durability, and cost.
For B2B buyers, the useful question is not simply how thick the foam is. It is whether the complete product performs appropriately under the conditions customers are likely to encounter.
Check Capacity, Load, and Carrying Comfort
A cooler bag intended to hold loose ice and multiple drinks should have a base and carrying system appropriate for the expected load.
Evaluate the bag's usable internal capacity rather than relying only on external dimensions. Insulation and lining reduce the space available inside, while irregular shapes may make some of that volume difficult to use.
Also consider handle length, shoulder-strap design, reinforcement, and how the bag behaves when loaded with ice and water.
Consider Cleaning and Long-Term Maintenance
For retail and promotional products, easy cleaning can influence customer satisfaction and repeat use.
A smooth interior that can be wiped clean is useful, but access to the bottom and corners matters as well. If the bag is intended for repeated loose-ice use, the maintenance instructions should clearly explain how to drain, clean, and dry it.
These details are particularly valuable when developing a product for outdoor events, beverage brands, grocery transport, or other repeated-use applications.
Request Evidence for Performance Claims
Buyers should be cautious about broad claims such as "leakproof," "keeps ice for 24 hours," or "suitable for all outdoor conditions" when no test conditions are provided.
Performance depends on the complete product and how it is used. If cold-retention or leak-resistance claims are important to the brand, define the relevant test conditions and ask for supporting evidence.
For example, a leakage evaluation should reflect the expected water exposure, loading, orientation, and duration. A thermal evaluation should document the initial temperatures, cooling source, ambient conditions, load, opening frequency, and measurement method.
Common Mistakes to Avoid When Using Ice in a Cooler Bag
Even a suitable cooler bag can perform poorly if the cooling method does not match the contents or the way the bag is used.
Assuming Every Insulated Bag Is Leakproof
Insulation and leak resistance are separate properties. A bag can slow heat transfer while still allowing water to escape through seams or the opening.Check the product instructions before using loose ice.
Pouring Ice Over Unprotected Food
Loose ice can wet food, soften packaging, and expose contents to potentially contaminated water.Keep food in suitable sealed containers, and choose gel packs when the contents need to remain dry.
Leaving the Bag in Direct Sunlight
Sunlight and hot surfaces increase the heat entering the bag. Move it into the shade and avoid leaving it in a hot vehicle.Better insulation helps, but it cannot eliminate the effects of extreme environmental conditions.
Opening the Bag Too Frequently
Each opening allows warmer air to enter and may disturb the arrangement of ice and food.Keep frequently accessed drinks separate from perishable meals when practical.
Leaving Meltwater Inside After Use
Standing water and food residue can create odors and make cleaning more difficult.Empty, clean, and dry the bag after use, especially when raw food or sugary drinks have been inside.
FAQ
Can you put regular ice cubes directly into a cooler bag?
Yes, provided the cooler bag is designed to handle loose ice and the resulting meltwater. If the bag is intended for ice packs only, use sealed packs or frozen water bottles instead.
How do I know if my cooler bag is stitched or heat-welded?
Look closely at the interior seams at the bottom corners of the bag:
If you see sewing thread, binding tape, or visible needle perforations, it is a stitched bag (use reusable ice packs only).
If the corners are smooth, plastic-welded, and have no thread or needle punctures, it is a heat-welded leakproof bag (safe for direct loose ice).
Is loose ice better than gel packs?
Loose ice is convenient for chilling sealed drinks and filling gaps around containers. Gel packs are usually better when food must stay dry or when the bag is not designed for standing water. The better choice depends on the contents and intended use.
What is the ideal ice-to-contents ratio for a day trip?
The industry-standard rule is a 2:1 ice-to-contents ratio (67% ice, 33% food and drinks by volume) for 24h–48h ice retention. For short 4-to-8-hour outings, a 1:1 ratio (50% ice, 50% contents) is sufficient.
What type of cooler bag is best for regular loose-ice use?
Look for a product specifically designed for loose ice, with an appropriate inner liner, suitable seam construction, a stable base, adequate insulation, and a closure system that matches the intended application. Confirm the manufacturer's leakage and care guidance before purchase.
Conclusion
You can put ice directly in a cooler bag, but only when the bag is designed to handle loose ice and the water produced as it melts. For sealed drinks and outdoor gatherings, loose ice can be convenient. For lunch bags, groceries, prepared meals, and other applications where moisture is a concern, gel packs or frozen water bottles are often the more practical choice.
Before using loose ice, check the inner lining, seams, closure, and structural condition of the bag. Pack chilled contents, protect moisture-sensitive food, and arrange the cold source according to the bag's size and intended use. Afterward, remove the meltwater, clean the interior, and let the bag dry completely.
Choosing a cooler bag according to its actual capabilities helps reduce leakage problems, protect the contents, and create a better experience for the people who use it.If you are sourcing insulated cooler bags for resale or custom merchandise, INITI offers customizable cooler bags engineered to support both ice packs and loose ice, with robust waterproof lining and reinforced seams for long-lasting performance.
Related Products
Related Blog Articles


 Hot News