A tote bag may look simple, but its ability to carry heavy items depends on much more than the strength of its fabric. One of the most important structural decisions is how the handles are attached to the bag body. Even when two tote bags use the same canvas material, dimensions, and handle webbing, differences in their attachment methods can lead to very different carrying performance.
Two common approaches are sewn handle attachments and metal rivet reinforcements. Stitching connects the handle to the fabric through multiple needle-and-thread penetrations, while rivets mechanically clamp several layers of material together. Both methods are widely used in bag construction, but they distribute force differently, have different failure risks, and suit different product designs.
For brands and procurement teams sourcing custom tote bags, choosing between these methods is not simply a matter of deciding which looks stronger. A rivet can provide additional mechanical security, but it does not automatically prevent the surrounding fabric from tearing. Similarly, a reinforced stitching pattern can provide a large attachment area, but its performance still depends on thread quality, stitch placement, fabric condition, and construction accuracy.
The right choice depends on the intended carrying load, frequency of use, material combination, product appearance, and manufacturing requirements.
This guide examines how stitching and rivet reinforcements affect tote bag load capacity, compares their structural advantages and limitations, explains common failure points, and provides practical recommendations for buyers developing custom tote bags for retail, promotional, grocery, and private-label applications.
Structural Mechanics of Handle Load Transfer
When a loaded tote bag is picked up, gravity pulls the contents downward against the base and lower side panels. This mechanical tension travels upward through the bag body and concentrates heavily at the handle attachment zones before reaching the user’s hands or shoulder.
The mechanical load path follows a direct progression:
- Contents Weight: Creates downward gravity and lateral pressure against the bottom and side walls.
- Body Panels: Fabric yarns transmit tensile force upward along the warp and weft weave.
- Handle Attachment Interface: The critical transition zone where upward pulling force meets the body fabric. This is the primary failure risk area.
- Handle Straps: Webbing or leather handles receive the consolidated load and transfer it to the user.
The Handle Attachment as a Primary Force Transfer Zone
The handle strap itself rarely breaks first. A standard cotton or polyester webbing strap with a width of 3.8 cm (1.5 inches) usually has a standalone tensile breaking strength exceeding 100 kg.
However, the connection between that webbing and the bag panel is a critical stress transition point. If a heavy-duty strap is joined to a lightweight canvas body with only a single short seam, the fabric or thread will fail long before the strap reaches its physical limit.
A well-engineered handle connection must transfer tensile force away from isolated points and distribute it smoothly across a stable, reinforced section of the main fabric.
Static Weight vs. Dynamic Shock Loading
Carrying a bag in the real world involves continuous movement rather than static holding. Real-world carrying introduces several mechanical variables:
- Dynamic Impact: Walking, swinging, and sudden lifting multiply the effective load by 1.5 to 2 times the static weight of the contents.
- Off-Center Pulling: When a user picks up a bag using only one handle or when the contents shift inside, one attachment zone absorbs nearly 100% of the total carrying stress.
- Angular Stress: Lifting a tote outward or wearing it over a bulky coat applies angular peeling forces to the upper edge of the seam or rivet, rather than a pure downward shear pull.
The Risk of Over-Perforation
A common misconception in bag manufacturing is that adding more fasteners automatically makes a connection stronger.
In reality, every needle penetration and every punched rivet hole removes or displaces structural yarns in the base fabric. When stitches are placed too densely (for example, above 12 stitches per inch) or when multiple rivets are set too close together, they act like a perforated tear strip. Under heavy load, the fabric simply tears along the line of holes.
Common Structural Failure Modes in Tote Bags
Understanding how and why handle connections fail allows product developers to identify root causes.
| Failure Area |
Visual Symptom |
Root Cause |
Engineering Correction |
| Stitch Line |
Threads snap, unravel, or pull loose |
Low thread tensile strength, friction wear, or poor backtacking |
Upgrade to bonded polyester thread (Tex 60–80) and lock all stitch ends |
| Fabric Along Seam |
Fabric tears cleanly along needle holes |
Needle perforation effect from excessive stitch density |
Reduce stitch density to 7–9 SPI; enlarge attachment surface area |
| Handle Attachment Area |
The entire handle pulls away, tearing a chunk of canvas |
Small attachment zone or lack of internal backing |
Extend handle overlap down the body; insert an internal reinforcement patch |
| Rivet Hardware |
Rivet pops open, stem snaps, or cap loosens |
Incorrect shank length, weak alloy, or improper setting pressure |
Match rivet post length to material stack; use calibrated setting dies |
| Fabric Around Rivet |
Fabric stretches, elongates, or tears around the hole |
Concentrated shear stress without adequate backing support |
Add a metal washer or dense reinforcement pad on the inside |
| Top Hem |
Upper hem unravels, rolls downward, or splits |
Fold depth is too narrow or missing interior reinforcement tape |
Increase top hem fold to at least 3.0 cm and use folded-edge construction |
| Base and Side Seams |
Bottom corners burst or side seams pull apart |
Narrow seam allowance or single-stitched assembly |
Use French seams, bound seams, or double-stitched flat-felled construction |
How Stitching Reinforces Tote Bag Handles
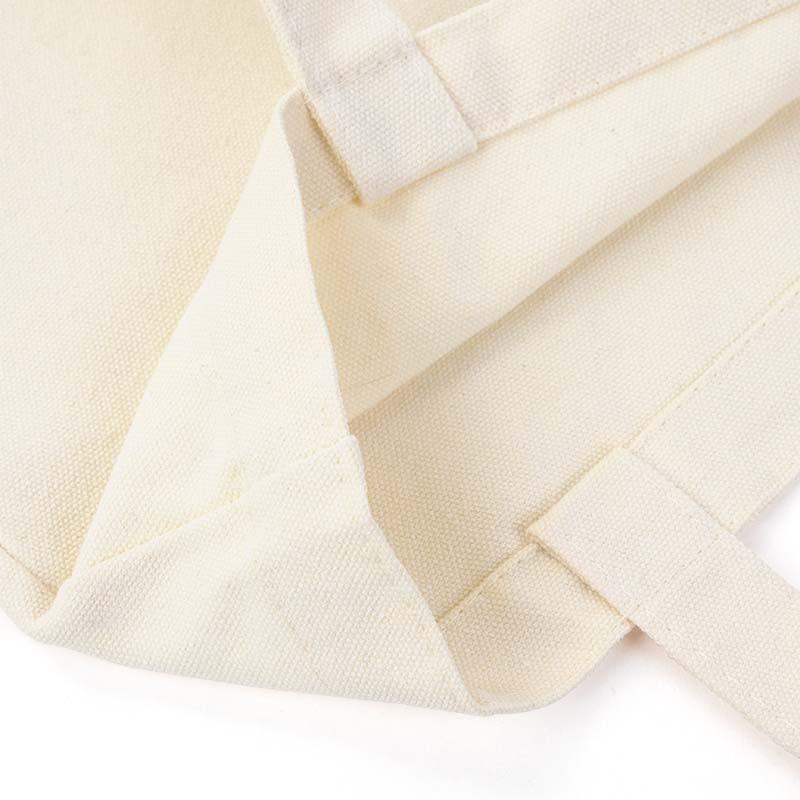
Stitching is one of the most common ways to attach handles to fabric tote bags. It creates a connection by passing sewing thread through the handle and bag body, forming a series of interlocking or otherwise secured stitches.
Unlike a single mechanical fastener, stitching can create a relatively large attachment area. The handle can be secured along its edges, across its width, or through a combination of patterns.
This flexibility makes sewing suitable for a wide range of tote bag constructions.
How a Sewn Handle Attachment Works
When a handle is sewn onto a tote bag, the sewing thread transfers force between the handle material and the bag panel.
As the bag is lifted, the thread experiences tension and the surrounding fabric experiences localized stress around the needle holes.
The performance of the connection depends on several variables:
- Stitch type and pattern
- Thread strength and compatibility
- Stitch density
- Attachment length and width
- Seam allowance
- Number of fabric layers
- Fabric thickness and resistance to tearing
- Quality and consistency of sewing
A properly designed sewn attachment can distribute force across multiple stitch lines instead of concentrating it at one small mechanical connection.
However, the stitches must be positioned correctly, and the fabric must be strong enough to resist the forces transferred through them.
Common Stitching Methods for Tote Bag Handle Reinforcement
Different stitching patterns serve different structural purposes. The following methods are particularly relevant when developing tote bags with reinforced handles.
A. Straight Stitching
Straight stitching is a basic sewing method in which stitches run in a continuous line.
It is commonly used to secure webbing handles, fabric straps, and folded material edges.
For tote bags, straight stitching may be applied in one or multiple parallel rows along the handle attachment area.
Advantages:
- Simple construction and efficient production
- Clean, unobtrusive appearance
- Suitable for many cotton, canvas, and polyester fabrics
- Easy to inspect during quality control
- Can provide effective attachment when the sewn area is sufficiently long
Limitations:
- A single short stitch line may concentrate pulling force.
- The beginning and end of the stitching may become vulnerable if the thread is not properly secured.
- Performance depends heavily on attachment dimensions and fabric quality.
Multiple parallel rows can improve the distribution of force, but they must be positioned with appropriate spacing and distance from the fabric edge.
Straight stitching is generally suitable for lightweight to medium-duty tote bags and designs where the handle attachment has sufficient surface area.
B. Double Stitching
Double stitching generally refers to two parallel stitch rows securing the same construction area.
It provides an additional line of attachment and can help prevent a connection from opening when one row becomes damaged.
For example, a cotton webbing handle may be secured with two parallel rows along its attachment length.
Advantages:
- Provides additional attachment security
- Helps distribute stress across more than one stitch line
- Offers a relatively clean appearance
- Suitable for everyday shopping and promotional tote bags
Limitations:
- Two rows of stitching do not automatically double the load capacity.
- If both rows are too close to the edge, the surrounding fabric may still tear.
- Poor thread selection can affect both rows in the same way.
Double stitching is useful when the attachment area needs additional security without introducing visible metal hardware.
C. Box Stitching
Box stitching uses a rectangular stitch pattern around the handle attachment area.
The handle or webbing is secured along the perimeter of the rectangular shape, creating a broader connection than a single straight stitch line.
This pattern is frequently used for tote handles, webbing loops, and strap attachment points.
Advantages:
- Secures several sides of the attachment area
- Provides a clear and relatively easy-to-inspect construction
- Suitable for flat webbing and fabric handles
- Can be integrated into many tote bag designs
Limitations:
- The corners of the stitch pattern may experience concentrated stress.
- A small box pattern may not provide enough attachment area for a larger bag.
- Its performance depends on the surrounding fabric and reinforcement.
Box stitching is particularly useful when the handle has a relatively flat attachment surface.
D. Box-X Stitching
Box-X stitching adds diagonal stitches across the rectangular box, creating an X-shaped pattern.
Compared with a simple box, the diagonal lines introduce additional stitch paths through the central attachment area.
This can help resist movement and distribute force in different directions.
Advantages:
- Provides reinforcement across the attachment area
- Helps stabilize webbing and flat handle connections
- Suitable for tote bags designed for frequent use
- Offers a recognizable reinforced appearance
Limitations:
- More needle penetrations are required.
- The pattern needs sufficient space to be effective.
- Excessive stitching can damage lightweight or loosely woven fabric.
- It is not automatically stronger than every other attachment method.
Box-X stitching is often a practical choice for medium- to heavy-duty canvas tote bags, particularly when the handle is expected to carry relatively dense products.
E. Bartack Stitching
Bartack stitching uses a dense group of short stitches to reinforce a specific point.
Unlike box stitching, which covers a larger rectangular area, a bartack concentrates reinforcement in a relatively small section.
It is commonly used at the ends of webbing, strap connections, pocket corners, and other stress points.
Advantages:
- Provides localized reinforcement
- Can help secure handle ends and webbing connections
- Suitable for production environments with bartack equipment
- Can be incorporated without substantially changing the overall bag appearance
Limitations:
- Covers a smaller area than a long handle attachment.
- Does not replace adequate attachment length or reinforcement fabric.
- Excessive density may damage certain materials.
Bartacks are particularly useful as secondary reinforcement at the ends of a larger sewn attachment.
Stitching Method Comparison
| Stitching Method |
Construction |
Main Structural Benefit |
Suitable Applications |
Main Consideration |
| Straight Stitching |
One or more linear rows |
Secures the handle along a defined line |
Lightweight and standard tote bags |
Attachment length and thread quality |
| Double Stitching |
Two parallel rows |
Adds a second attachment line |
Everyday shopping totes |
Stitch spacing and edge distance |
| Box Stitching |
Rectangular stitch pattern |
Secures multiple sides of the attachment |
Canvas and webbing handles |
Box dimensions and fabric strength |
| Box-X Stitching |
Box pattern with diagonal X |
Adds reinforcement across the central area |
Medium- to heavy-duty tote bags |
Avoid excessive needle perforations |
| Bartack Stitching |
Dense short stitch group |
Reinforces specific stress points |
Handle ends and webbing tabs |
Requires a suitable base construction |
No single pattern should be selected based on appearance alone. The stitch construction needs to match the material, handle dimensions, expected load, and overall bag design.
Why Thread Quality and Stitch Density Matter
Even a well-designed stitch pattern can underperform if the thread is unsuitable.
Thread must have sufficient tensile strength and abrasion resistance for the intended application. It should also be compatible with the sewing machine, needle, fabric thickness, and required stitch construction.
A thread that is too weak may break under repeated tension. A thread that is excessively thick for a lightweight fabric may create unnecessary needle damage or poor stitch formation.
Stitch density also requires balance.
Too few stitches may leave the handle insufficiently secured. Too many stitches can create a weakened line of perforations, particularly in thin or loosely woven fabrics.
For production specifications, buyers should confirm the thread type, stitch pattern, approximate stitch density, and attachment dimensions rather than relying on a general statement such as "reinforced stitching."
Recommended Stitch Density (SPI - Stitches Per Inch) by Material
- Lightweight Canvas / Muslin (6–10 oz): 8 – 10 SPI (Stitch length approx. 2.5–3.2 mm)
- Heavy Duck Canvas (12–18 oz): 6 – 7 SPI (Stitch length approx. 3.6–4.2 mm)
- Extra-Heavy Duck Canvas (20–24 oz): 5 – 6 SPI (Stitch length approx. 4.2–5.0 mm)
- Technical Cordura / Oxford Nylon: 6 – 8 SPI (Stitch length approx. 3.2–4.2 mm)
- Non-Woven PP (80–120 GSM): 5 – 6 SPI (Must use ball-point needles)
- Genuine Leather (2.0–3.5 mm): 5 – 6 SPI (Stitch length approx. 4.2–5.0 mm)
When Stitching Is the Better Choice
Stitching is generally a practical choice when:
- The bag is primarily made from cotton, canvas, polyester, or similar sewable fabrics.
- The handle needs a relatively large attachment area.
- The design requires a clean fabric-focused appearance.
- The product needs flexibility around the handle connection.
- The bag may be washed or requires minimal metal components.
- The design involves multiple fabric layers or an extended handle structure.
For promotional tote bags, reusable shopping bags, and many canvas retail bags, sewn handle attachments offer a good balance of production efficiency, appearance, and structural flexibility.
However, the actual performance still needs to be verified through testing of the finished bag.
How Rivet Reinforcements Work on Tote Bags

Rivets are mechanical fasteners used to connect and secure layers of material.
A typical rivet consists of a head and a shank or post. During installation, the post passes through prepared holes in the materials, and the end is mechanically deformed or secured to form a fixed connection.
Unlike stitching, which distributes attachment through multiple thread penetrations, a rivet creates a localized mechanical connection.
Rivets are commonly used in leather goods, denim products, canvas accessories, work bags, and selected tote bag designs.
In textile bags, they are often installed around handle attachment points to provide additional mechanical retention or to create a particular industrial or premium appearance.
How a Rivet Transfers Force
When a riveted tote handle is pulled, the force is transferred from the handle or attachment tab into the rivet.
The rivet holds the connected layers together through mechanical clamping and bearing contact.
The load is then transferred into the surrounding fabric or reinforcement material.
This creates an important distinction:
The rivet may be stronger than the material surrounding it, but the connection can still fail if the fabric cannot withstand the localized force.
For example, a metal rivet installed through a thin cotton panel may remain intact while the fabric around the hole gradually stretches and tears.
This is why rivet selection must consider the entire material stack rather than just the metal component.
Common Rivet Types Used in Bag Construction
Different rivets are designed for different materials, thicknesses, and installation requirements.
| Rivet Type |
Construction |
Common Applications |
Main Consideration |
| Single-Cap Rivet |
Decorative cap on one side with a post and backing |
Canvas accessories and simple bag details |
Backside finishing and suitable post length |
| Double-Cap Rivet |
Finished caps on both sides |
Tote handles and visible hardware connections |
Both sides have a finished appearance |
| Tubular Rivet |
Hollow or partially hollow metal post |
Leather goods and selected bag constructions |
Correct post length and setting pressure |
| Semi-Tubular Rivet |
Partially hollow shank that is flared during installation |
Fabric and leather accessories |
Material thickness and setting consistency |
| Solid Rivet |
Solid metal shank deformed during installation |
Heavy-duty hardware applications |
Requires suitable tooling and access |
The availability and suitability of each type depend on the bag construction and production equipment.
For most custom textile tote bags, the decision should start with the material thickness and the required connection design, not the appearance of the rivet.
Engineering Requirements for Riveted Bag Construction
To prevent premature tearing and hardware failure, riveted designs must follow these structural rules:
- Mandatory Backing Washers or Reinforcement Pads: A rivet should never be set through a single layer of woven canvas. An internal metal washer, high-density polyethylene (HDPE) reinforcement plate, or heavy leather/webbing backing patch must be placed on the inside of the bag. This backing increases the load-bearing surface area by 300% to 500%, preventing the rivet head from pulling through the fabric.
- Strict Edge Distance Tolerances: The center of the rivet hole must be positioned at a distance of at least 1.5 to 2.0 times the rivet cap diameter away from any raw or finished fabric edge. Holes punched too close to the hem edge will suffer catastrophic edge blowout under heavy loads.
- Precise Post Length Matching: The rivet post length must equal the uncompressed material stack thickness plus 2.0 to 3.0 mm for proper roll-over deformation. A post that is too short will pull apart under light tension, while a post that is too long will bend sideways, creating an unstable, loose connection.
- Corrosion Resistance and Surface Finishing: Metal hardware must be specified as solid brass, stainless steel, or high-grade zinc alloy with electroplated finishes (such as antique brass, gunmetal, or nickel-free coating). For washable bags, the hardware must pass a 24 to 48-hour salt spray test (ASTM B117) to ensure it will not rust or bleed discoloration into the canvas when wet.
Advantages of Rivet Reinforcement
Rivets provide several benefits in bag construction.
- Mechanical connection: A properly installed rivet creates a direct mechanical connection between material layers. It does not depend on sewing thread to maintain that particular connection.
- Localized reinforcement: Rivets can reinforce selected attachment points, especially when the design already has a suitable folded or layered construction.
- Distinctive appearance: Metal rivets can create a workwear, denim, industrial, or premium leather-goods appearance.
- Consistent hardware positioning: When installation equipment and specifications are controlled, rivets can provide consistent placement across production batches.
- Useful for selected material combinations: Rivets may be appropriate when connecting leather tabs, thick canvas layers, or hardware components that are difficult to secure through a simple fabric seam.
Limitations of Rivets
Rivets also have limitations that buyers should consider before incorporating them into a custom tote bag.
- Localized stress concentration: Unlike a long sewn attachment, a rivet transfers force through a relatively small area. The surrounding fabric must withstand the resulting bearing and pulling forces.
- Hole-related damage: Installing a rivet requires a hole or prepared opening. If the hole is too large, too close to an edge, or poorly finished, the fabric may become more vulnerable to tearing.
- Limited flexibility: A rigid metal connection may restrict movement between the connected layers. Repeated bending around the connection can create wear in some constructions.
- Corrosion and surface deterioration: Metal selection matters, especially for bags exposed to moisture, frequent cleaning, or outdoor conditions. An unsuitable finish may corrode, discolor, or scratch surrounding materials.
- Installation consistency: Incorrect setting pressure can cause loose connections, damaged caps, deformed hardware, or excessive compression of the fabric.
- Additional production requirements: Rivets require suitable tools, hardware sourcing, positioning, and inspection. They may increase production cost and complicate certain washable or minimalist designs.
For these reasons, rivets should be treated as a structural design component rather than an automatic upgrade to every tote bag.
The Hybrid Construction: Combining Stitching and Rivets
For heavy-duty canvas bags, premium retail collections, and technical utility totes, combining stitching and rivets into a unified hybrid anchor offers the highest structural reliability.
Structural Layering of a Hybrid Anchor
In a hybrid construction, the components are layered systematically from exterior to interior:
- Outer Layer: The main handle webbing or leather reinforcement tab.
- Intermediate Layer: The main body canvas panel, integrated into the double-folded top hem.
- Interior Layer: A high-density reinforcement patch (canvas, 600D polyester, or leather backing).
- Primary Perimeter Fastening: A continuous rectangular stitched box locking down the outer edges.
- Secondary Center Fastening: A metal rivet installed directly through the center point of the stitched box, locked on the reverse side with a washer.
Structural Advantages of Hybrid Anchoring:
- Redundant Load Paths: Under standard daily loading, the flexible stitched box absorbs the continuous tensile shear force. When subjected to sudden high-impact drops or shock loads, the central rivet acts as a rigid mechanical stop, preventing the seam from peeling open.
- Elimination of Handle Corner Peeling: Over time, repeated pulling can cause the top corners of a sewn box stitch to loosen. A central rivet clamps the core of the webbing firmly against the body, neutralizing corner peel forces.
- Material Transition Security: When joining dissimilar materials—such as anchoring vegetable-tanned leather handles to 16 oz cotton canvas—sewing alone can suffer from thread abrasion against the stiff leather edge. The rivet provides permanent clamping force, while the perimeter stitching keeps the leather tab flush against the canvas.
Direct Engineering Comparison
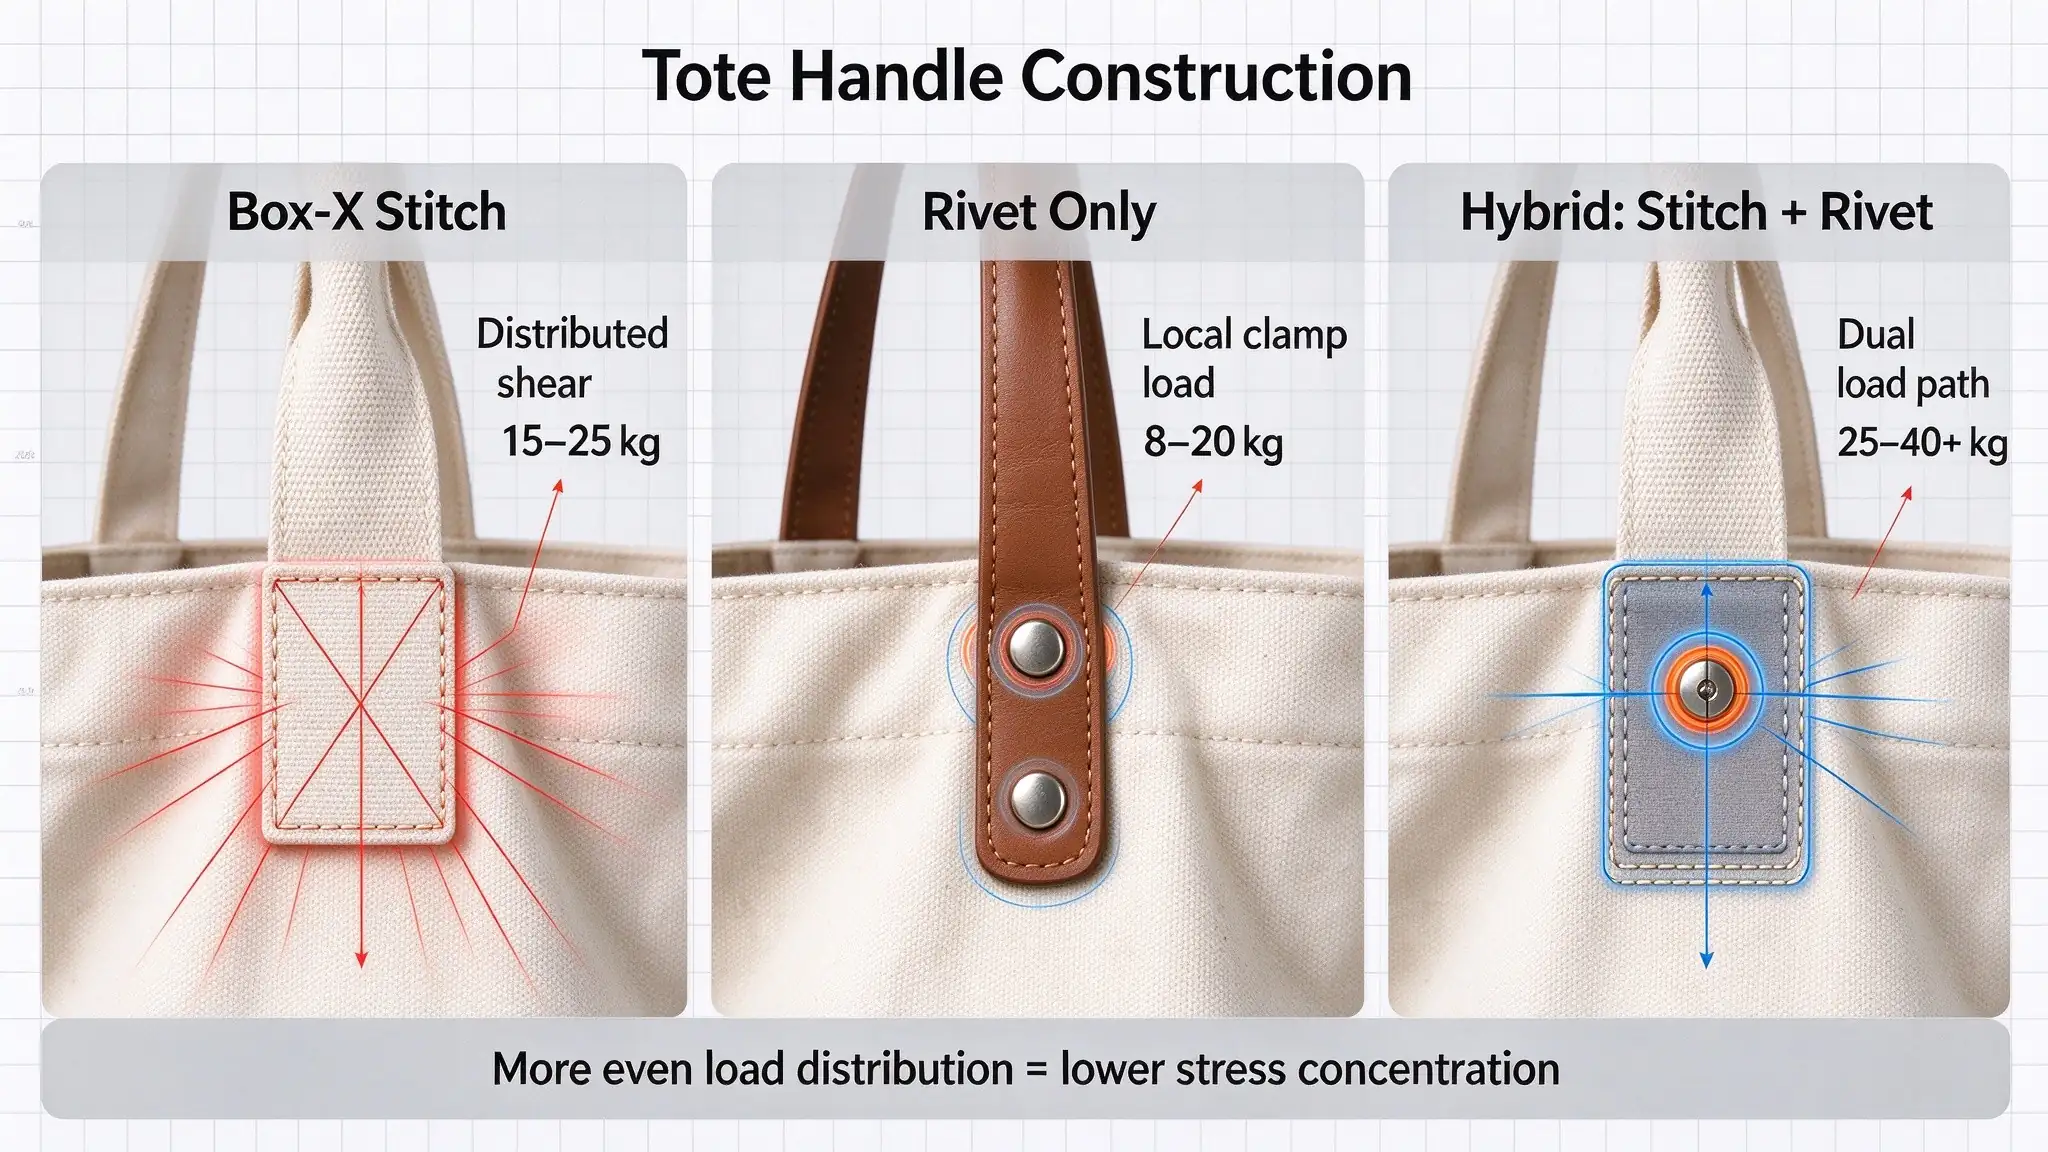
| Evaluation Dimension |
Sewn Handle Construction (Box-X) |
Riveted Handle Construction |
Hybrid Construction (Stitched + Riveted) |
| Load Distribution Mechanism |
Broad surface area shear distribution across hundreds of thread interlocks |
Concentrated mechanical point clamping and post-bearing contact |
Two-stage distribution: perimeter stitching absorbs shear; center rivet locks stack |
| Estimated Safe Working Load |
15 – 25 kg (33 – 55 lbs) |
8 – 20 kg (18 – 44 lbs) |
25 – 40+ kg (55 – 88+ lbs) |
| Fabric Stress Concentration |
Low to Moderate (spread over 10–20 cm² per handle) |
High (concentrated in 5–8 mm radius around hole) |
Low to Moderate (cushioned by surrounding stitch box) |
| Suitability for Thin Fabrics (<8 oz) |
High (when backed with top hem fold) |
Very Poor (high tear-out risk without rigid backing) |
Poor to Fair (requires multi-layer folded hem) |
| Suitability for Layered / Leather Tabs |
Moderate (requires heavy-duty walking foot sewing machine) |
Excellent (effortlessly clamps thick leather to canvas) |
Excellent (industry standard for heritage & luxury goods) |
| Flexibility & Natural Drape |
High (handle flexes naturally with the bag body) |
Rigid (creates fixed, stiff pivot points at attachment) |
Semi-Rigid (stable anchor zone with flexible strap above) |
| Washability & Maintenance |
Excellent (fully machine washable; thread shrinks/stretches with fabric) |
Moderate to Poor (risk of metal oxidation or snagging inside washing machines) |
Moderate (spot cleaning or gentle hand washing recommended) |
| Production Speed & Assembly Line |
High (completed in single continuous sewing operation) |
Moderate (requires hole punching + hardware alignment + setting press) |
Multi-Stage (sewing line → punching station → riveting station) |
| Tooling & Equipment Costs |
Low (standard industrial sewing machines) |
Moderate (setting dies, punching dies, pneumatic presses) |
Moderate to High (requires balanced multi-station workflow) |
Substrate Material Compatibility
The choice between stitching, rivets, or hybrid reinforcement must align with the physical properties of the bag's main fabric.
| Base Material |
Typical Fabric Weight |
Recommended Attachment Method |
Engineering Rationale |
| Lightweight Cotton / Calico |
4 – 6 oz (135 – 200 gsm) |
Double Straight Stitch or Simple Box |
Rivets will tear through thin cotton yarns; sewing within a folded 3 cm hem provides sufficient surface strength. |
| Mid-Weight Cotton Canvas |
8 – 12 oz (270 – 400 gsm) |
Box Stitch or Box-X Stitch |
The balanced plain weave of medium duck canvas provides excellent yarn interlock for thread holding without tearing. |
| Heavy-Duty Duck Canvas |
14 – 20 oz (470 – 680 gsm) |
Box-X Stitch or Hybrid (Box + Rivet) |
Thick yarns easily support both heavy bonded thread and the localized bearing forces of backed rivets. |
| Polyester / Nylon (Oxford / Cordura) |
300D – 1000D |
Box-X Stitch with Heat-Sealed Ends |
Synthetic filaments offer high tensile strength. Rivet holes must be heat-punched or laser-cut to melt the edges and prevent yarn fraying. |
| Laminated Jute / Burlap |
300 – 450 gsm |
Box-X Stitch with Heavy Cotton Backing Tape |
Jute has a very coarse, open weave. Rivets will pull straight through without massive washers; stitching requires wide backing tape to trap the coarse fibers. |
| Non-Woven Polypropylene (NWPP) |
70 – 120 gsm |
Ultrasonic Cross-Welding or Light Sewing (5–6 SPI) |
Never use rivets on non-woven materials. Needles must have low stitch density (5–6 SPI); ultrasonic heat-welding is preferred. |
| Waxed Canvas |
10 – 16 oz (340 – 540 gsm) |
Hybrid (Sewn Box + Brass Rivet with Burr) |
The wax coating provides extra fiber cohesion, making it an ideal substrate for heavy solid copper/brass rivets paired with structural stitching. |
Common Design Mistakes That Reduce Tote Bag Load Capacity
A bag may include reinforced stitching, metal rivets, or heavyweight canvas and still fail under load.
This often happens because individual components are selected without considering how they work together.
The following mistakes are particularly important for buyers and product developers to avoid.
Assuming More Stitching Always Means Greater Strength
Adding more stitch rows may appear to be an easy way to reinforce a handle.However, excessive stitching can create too many needle holes within a small area.These holes may form a weakened line, particularly in thin fabrics or materials with limited tear resistance.A better approach is to determine the required attachment dimensions first, then select an appropriate stitch pattern and density.The goal is a balanced attachment rather than the maximum possible number of stitches.
Installing Rivets Without Reinforcement
One common mistake is installing a metal rivet directly through a fabric panel without considering the material's ability to resist pull-through.The rivet may remain secure while the fabric gradually stretches around the hole.This is especially problematic when the fabric is thin, loosely woven, or repeatedly exposed to pulling forces.An internal patch, washer, or suitable backing structure may help, but it must be designed for the actual material and load direction.
Using the Wrong Rivet Post Length
Rivet post length needs to match the combined thickness of all connected layers.A post that is too short may not form a secure fastening.A post that is too long may deform incorrectly or create an unstable connection.This can result in loose hardware, uneven caps, or inconsistent fastening strength.Buyers should confirm the full material stack during sample development rather than selecting rivets based only on cap diameter.
Placing Attachments Too Close to the Fabric Edge
Both sewing and rivets can fail when positioned too close to the edge.For stitching, insufficient edge distance can allow the fabric to pull away from the seam.For rivets, a hole positioned too close to the edge may leave insufficient material to resist the pulling force.The correct distance depends on the fabric, hardware size, seam allowance, and attachment geometry.There is no single edge-distance measurement suitable for every tote bag.
Ignoring the Effect of Bag Size
A large tote bag may hold more items than a small tote, but its larger dimensions can also create additional mechanical stress.A wide bag with a deep gusset may experience greater leverage around the handles and bottom corners.If the bag is designed for heavier products, the handle attachment, side seams, and bottom construction should be developed together.Simply increasing the number of rivets or stitch rows may not solve a structural problem caused by an unsuitable overall design.
Treating Decorative Reinforcement as Structural Reinforcement
Some bags include visible X-shaped stitching or metal rivets mainly for appearance.These details may resemble heavy-duty construction without providing the required mechanical performance.For example, a decorative rivet may have a different post construction from a structural rivet.Likewise, decorative stitching may not use suitable thread or sufficient attachment dimensions.Buyers should confirm which components are intended to carry load and which are included primarily for appearance.
Failing to Consider Repeated Loading
A bag that survives one lifting test may still deteriorate after repeated use.Thread can experience abrasion, rivets can loosen, and fabric holes can gradually enlarge.A product intended for daily shopping or retail use should be evaluated through repeated loading rather than a single demonstration.The testing method should reflect the product's intended service conditions.
How to Test Tote Bag Load Capacity Before Bulk Production
For B2B buyers, a supplier's description of reinforced stitching or heavy-duty rivets is not enough to establish the carrying performance of a finished tote bag.
The most useful evidence comes from testing the actual product construction.
A load test should evaluate the complete bag, including the handles, attachment points, seams, and bottom panel.
Define the Required Carrying Load
Before testing, establish the intended carrying requirement.
For example, a tote bag developed for lightweight promotional merchandise may have very different requirements from a reusable grocery bag designed for packaged food and bottled products.
Buyers should define:
- Intended product application
- Maximum contents weight
- Typical weight distribution
- Carrying frequency
- Expected lifting method
- Whether the bag is intended for repeated reuse
It is also important to distinguish between the desired working load and the breaking load.
The working load is the weight the bag is expected to carry during normal use.
The breaking load is the force or weight at which a component or finished construction fails under a defined test.
These values are not interchangeable.
A supplier should not describe a bag's breaking load as its recommended everyday carrying capacity.
Conduct a Finished-Bag Static Load Test
A static load test evaluates how the bag performs while carrying a specified weight for a defined period.
A practical procedure can include:
- Inspect the finished bag before testing.
- Record the material, dimensions, handle construction, and reinforcement method.
- Place a controlled weight inside the bag.
- Distribute the weight according to the intended application.
- Lift or suspend the bag using its normal handles.
- Maintain the agreed load for a specified duration.
- Inspect the handle connections, seams, fabric, rivets, and bottom panel.
- Record any deformation or damage.
For example, a buyer may request that a tote bag carry a specified 10 kg working load for a defined period.
This is an illustrative project requirement, not a universal standard for all tote bags.
The test duration, lifting method, and acceptance criteria should be agreed upon before production.
Conduct a Repeated-Lifting Test
A static test does not fully represent everyday handling.
A repeated-lifting test can help identify problems that develop over time.
The test involves repeatedly lifting and lowering the loaded bag according to an agreed procedure.
After the specified number of cycles, inspect:
- Stitch breakage
- Loose thread
- Handle movement
- Fabric distortion
- Enlarged rivet holes
- Loose hardware
- Seam opening
- Permanent deformation
The cycle count should reflect the product's intended use and project requirements.
A grocery tote used several times per week may need a different durability target from a promotional bag distributed at a one-time event.
Inspect the Actual Failure Location
A test is more useful when it records how the bag behaves, not just whether it passes or fails.
| Observed Damage |
Possible Cause |
Potential Design Adjustment |
| Thread breaks at the handle end |
Unsuitable thread or poor stitch securing |
Review thread specification and end reinforcement |
| Fabric tears along the stitch line |
Excessive perforation or insufficient fabric strength |
Adjust stitch density, attachment area, or reinforcement |
| Handle pulls away from the body |
Insufficient attachment length or poor load distribution |
Extend the handle attachment |
| Rivet becomes loose |
Incorrect post length or setting pressure |
Review rivet specification and installation process |
| Fabric tears around rivet |
Localized stress or insufficient backing |
Add suitable backing or reconsider rivet placement |
| Bottom seam opens |
Insufficient seam construction |
Review seam allowance and bottom reinforcement |
| Bag deforms significantly |
Overall structure unsuitable for the required load |
Reconsider dimensions, material, and construction |
This information helps the product development team make targeted adjustments rather than adding unnecessary reinforcements throughout the bag.
Use Appropriate Laboratory Testing When Required
For projects requiring more formal quality documentation, buyers can consider relevant textile testing methods.
ASTM D1683/D1683M addresses the failure of sewn seams in woven fabrics. It evaluates the force applied perpendicular to the seam and recognizes failure through fabric rupture, sewing-thread rupture, and seam slippage.
ISO 13935-1 is another relevant method for determining the maximum force to seam rupture using a strip test approach.
These methods provide useful information about sewn seam performance, but they should not be treated as direct substitutes for testing a complete tote bag under actual carrying conditions.
A seam-strength test evaluates a specific sewn construction. A finished-bag load test evaluates how the entire product performs.
For riveted connections, the testing procedure should be selected according to the hardware, material combination, and intended application.
Buyers should also remember that a test result is meaningful only when the sample construction, test conditions, and acceptance criteria are clearly documented.
Compare Stitching and Rivet Samples Under Equal Conditions
If a buyer is unsure which attachment method to choose, the most practical approach is to develop two samples using the same basic bag specifications.
For a fair comparison, keep the following elements consistent:
- Main fabric
- Bag dimensions
- Handle material
- Handle width
- Handle length
- Reinforcement material
- Intended carrying load
Change only the attachment construction being evaluated.
For example:
- Sample A: Box-X stitched handle attachment
- Sample B: Riveted handle tabs with appropriate backing
Both samples should undergo the same static and repeated-lifting procedures.
This comparison can reveal whether the additional hardware provides a measurable benefit for the actual product.
It also helps buyers evaluate whether the difference justifies any additional cost or visual change.
How to Specify Stitching and Rivet Reinforcements in a Custom Tote Bag Order
For procurement teams, product specifications should describe the intended construction clearly enough that different production batches can be compared consistently.
A specification that simply states "reinforced handle" leaves too much room for interpretation.
Instead, buyers should define the main components and confirm the construction during sample approval.
Key Specifications for Sewn Handle Attachments
| Specification |
What Buyers Should Confirm |
| Handle Material |
Cotton webbing, polyester webbing, self-fabric handle, or another material |
| Handle Width |
Actual finished width |
| Attachment Length |
How far the handle extends down the bag body |
| Stitch Pattern |
Straight, double, box, box-X, or bartack reinforcement |
| Thread |
Suitable thread type and strength for the material |
| Stitch Density |
Agreed production specification |
| Reinforcement Patch |
Material, dimensions, and position |
| Edge Distance |
Distance between the stitch line and fabric edge |
| Seam Allowance |
Required allowance for the handle and bag panel |
| Inspection |
Stitch consistency, loose threads, skipped stitches, and fabric damage |
These details help ensure that the approved sample and bulk production use the same attachment construction.
Key Specifications for Rivet Attachments
| Specification |
What Buyers Should Confirm |
| Rivet Type |
Single-cap, double-cap, tubular, semi-tubular, or solid |
| Metal Material |
Actual metal composition |
| Surface Finish |
Nickel, antique brass, gunmetal, or other specified finish |
| Cap Diameter |
Visible cap measurement |
| Post Diameter |
Shank measurement |
| Post Length |
Compatibility with total material thickness |
| Backing |
Washer, reinforcement plate, or other support |
| Installation Position |
Distance from fabric edges and nearby stitching |
| Setting Quality |
No looseness, deformation, or sharp edges |
| Corrosion Resistance |
Suitable performance for intended conditions |
| Inspection |
Consistent placement, secure fastening, and fabric condition |
For private-label products, hardware finish and consistency may also be important brand requirements.
Questions to Ask Your Bag Supplier
Before approving a custom tote bag sample, buyers should ask:
- What handle attachment method is being used?
- Is the stitching or hardware intended to carry the main load?
- Is there an internal reinforcement patch behind the handle connection?
- What thread and stitch pattern are used?
- If rivets are included, what are their material and dimensions?
- How is the rivet post length matched to the material thickness?
- Has the finished bag been tested under the required carrying load?
- Does the sample represent the proposed bulk production construction?
- What are the acceptance criteria for the load and repeated-use tests?
These questions help distinguish between a product that simply looks reinforced and one that has been developed around a defined functional requirement.
Why Pre-Production Sample Approval Matters
The attachment method should be confirmed before bulk manufacturing begins.
A pre-production sample allows buyers to inspect the actual handle construction, stitching quality, hardware placement, reinforcement layers, and overall appearance.
If changes are needed, they can be made before the production specification is finalized.
This is particularly important when a product uses custom rivets, special metal finishes, leather tabs, or a combination of sewing and hardware.
For large orders, the approved sample should serve as the reference for production workmanship and inspection.
Cost, Production Efficiency, and Customization Considerations
The reinforcement method also affects manufacturing cost and production planning.
For B2B buyers, the lowest-cost attachment method is not necessarily the most economical choice over the product's full lifecycle.
A suitable construction should balance functional requirements, appearance, production efficiency, and target pricing.
Stitching Costs
Sewing is already an essential process in most fabric tote bag manufacturing.
Adding an appropriate reinforced stitch pattern may increase sewing time, but it can often be integrated into the existing production workflow.
The cost depends on:
- Number of stitch rows
- Stitch pattern complexity
- Thread specification
- Additional fabric layers
- Sewing machine requirements
- Production quantity
- Operator time
A simple double-stitched handle attachment may be relatively straightforward, while a more complex layered construction may require additional handling and sewing operations.
Rivet Costs
Rivets introduce additional material and installation requirements.
Their cost depends on:
- Metal type
- Rivet dimensions
- Surface finish
- Customization requirements
- Number of rivets per bag
- Installation equipment
- Labor and inspection time
Special finishes or customized hardware may also require additional development and sourcing.
For small bags or designs with many attachment points, the additional hardware can have a noticeable impact on the unit cost.
Comparing the Overall Cost
| Cost Factor |
Stitching |
Rivets |
| Main Materials |
Sewing thread and possible reinforcement fabric |
Metal hardware and possible backing |
| Production Equipment |
Sewing machines |
Rivet-setting tools or machines |
| Labor |
Sewing and inspection |
Hardware positioning, setting, and inspection |
| Design Changes |
Often easier to adjust through sewing specifications |
May require different hardware or installation adjustments |
| Appearance Options |
Thread color and stitch pattern |
Metal finish, cap style, and hardware size |
| Maintenance Considerations |
Thread wear and seam repair |
Hardware loosening, corrosion, or replacement |
The actual cost comparison should be based on the finished construction rather than a simple per-component price.
For example, a design that requires a large reinforcement patch and complex stitching may not always be cheaper than one using a suitable rivet connection.
Likewise, adding metal rivets to a bag that does not need them may increase cost without improving practical performance.
Practical Recommendations: Choosing the Right Construction for Different Tote Bag Projects
There is no universal reinforcement method that works best for every tote bag.
The following examples illustrate how buyers can approach the decision based on product requirements.
Standard Promotional Cotton Tote
Typical requirements:
- Lightweight to medium-weight cotton fabric
- Relatively simple construction
- Printed brand logo
- Occasional use
- Cost-conscious bulk production
Suggested construction:
A suitable sewn handle attachment using straight or double stitching.
The attachment should have enough length and sufficient seam allowance for the intended carrying load.
Metal rivets are generally optional rather than necessary.
Heavy Canvas Shopping Tote
Typical requirements:
- Repeated shopping use
- Heavier packaged goods
- Larger carrying volume
- Durable handle connections
- Frequent lifting and unloading
Suggested construction:
Box stitching or box-X stitching combined with suitable reinforcement material.
A longer handle attachment may help distribute the pulling force across a wider section of the body.
The bottom and side seams should also be evaluated under the intended load.
Premium Denim or Canvas Fashion Tote
Typical requirements:
- Distinctive material appearance
- More detailed hardware
- Higher perceived product value
- Repeated everyday use
Suggested construction:
A sewn handle attachment combined with selected rivets or reinforced handle tabs.
This allows the design to retain the broad attachment area of sewing while incorporating metal details where appropriate.
Leather-Trimmed Retail Tote
Typical requirements:
- Leather or synthetic leather handle components
- Canvas or textile body
- Premium appearance
- Secure attachment between different materials
Suggested construction:
Sewn handle tabs with suitable rivet reinforcement where the material thickness supports it.
The backing structure and rivet dimensions should be confirmed during sampling.
Lightweight Foldable Tote
Typical requirements:
- Low product weight
- Compact folding
- Minimal hardware
- Easy storage
- Reusable carrying function
Suggested construction:
A sewn attachment with an appropriate reinforcement area.
Rivets are often unnecessary because they add weight and may create rigid points that interfere with folding.
FAQ
Is stitching stronger than rivets on a tote bag?
Neither method is universally stronger. Stitching can distribute pulling force across a relatively large attachment area, while rivets create localized mechanical connections. The result depends on fabric strength, thread quality, stitch construction, rivet dimensions, backing material, and installation quality.
Should a tote bag use both stitching and rivets?
A hybrid construction can be useful for premium canvas, denim, and leather-trimmed bags. Stitching can provide a broader attachment area, while rivets add localized mechanical retention. However, both methods need to be positioned correctly, and the complete construction should be tested.
Do more stitches always increase tote bag load capacity?
No. Additional stitches can provide more attachment points, but excessive needle penetrations may weaken certain fabrics. The appropriate stitch density and pattern depend on the material, thread, and attachment design. A well-positioned reinforcement structure is generally more important than simply increasing the number of stitches.
Does heavyweight canvas always have a higher load capacity?
Not necessarily. Fabric weight is only one factor. Handle attachment, stitch construction, reinforcement, seam quality, and bag dimensions all influence the performance of the finished product. A well-designed tote made from medium-weight canvas may perform better than a poorly constructed bag made from heavier material.
Are rivets suitable for washable tote bags?
They can be, provided the metal material and surface finish are suitable for the intended cleaning conditions. Buyers should also check whether repeated washing affects the hardware, surrounding fabric, or reinforcement structure. The care instructions should be established before bulk production.
Conclusion
Stitching and rivet reinforcements offer different advantages in tote bag construction.
Stitching is often the more flexible solution for fabric-based bags because it can secure handles across a relatively large area and integrate easily with different textile constructions. Box stitching, box-X stitching, double stitching, and bartack reinforcement can all contribute to a reliable handle connection when properly designed.
Rivets offer a different approach. They provide localized mechanical fastening and can be useful for leather tabs, denim details, layered canvas constructions, and selected premium designs. However, their effectiveness depends on the surrounding material, backing support, and installation quality.
For many custom tote bags, the best solution is not simply choosing one method over the other. It is selecting an attachment structure that matches the intended carrying load, fabric, handle design, appearance, and production requirements.
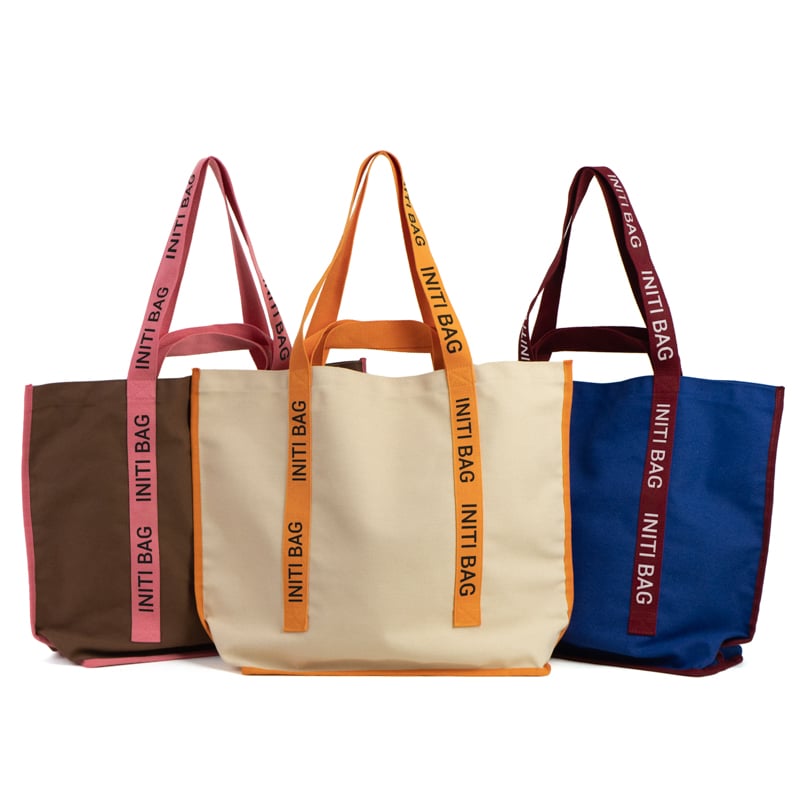
At INITI, custom tote bag development can be adjusted around material selection, dimensions, handle construction, stitching, reinforcement, hardware, and branding details. By confirming these specifications during sample development, buyers can create tote bags that balance practical carrying performance with their target product positioning and budget.
The most reliable tote bag is not the one with the most stitches or the largest rivets. It is the one whose entire construction has been designed and tested for the way it will actually be used.
Related Products
Related Blog Articles




 Hot News